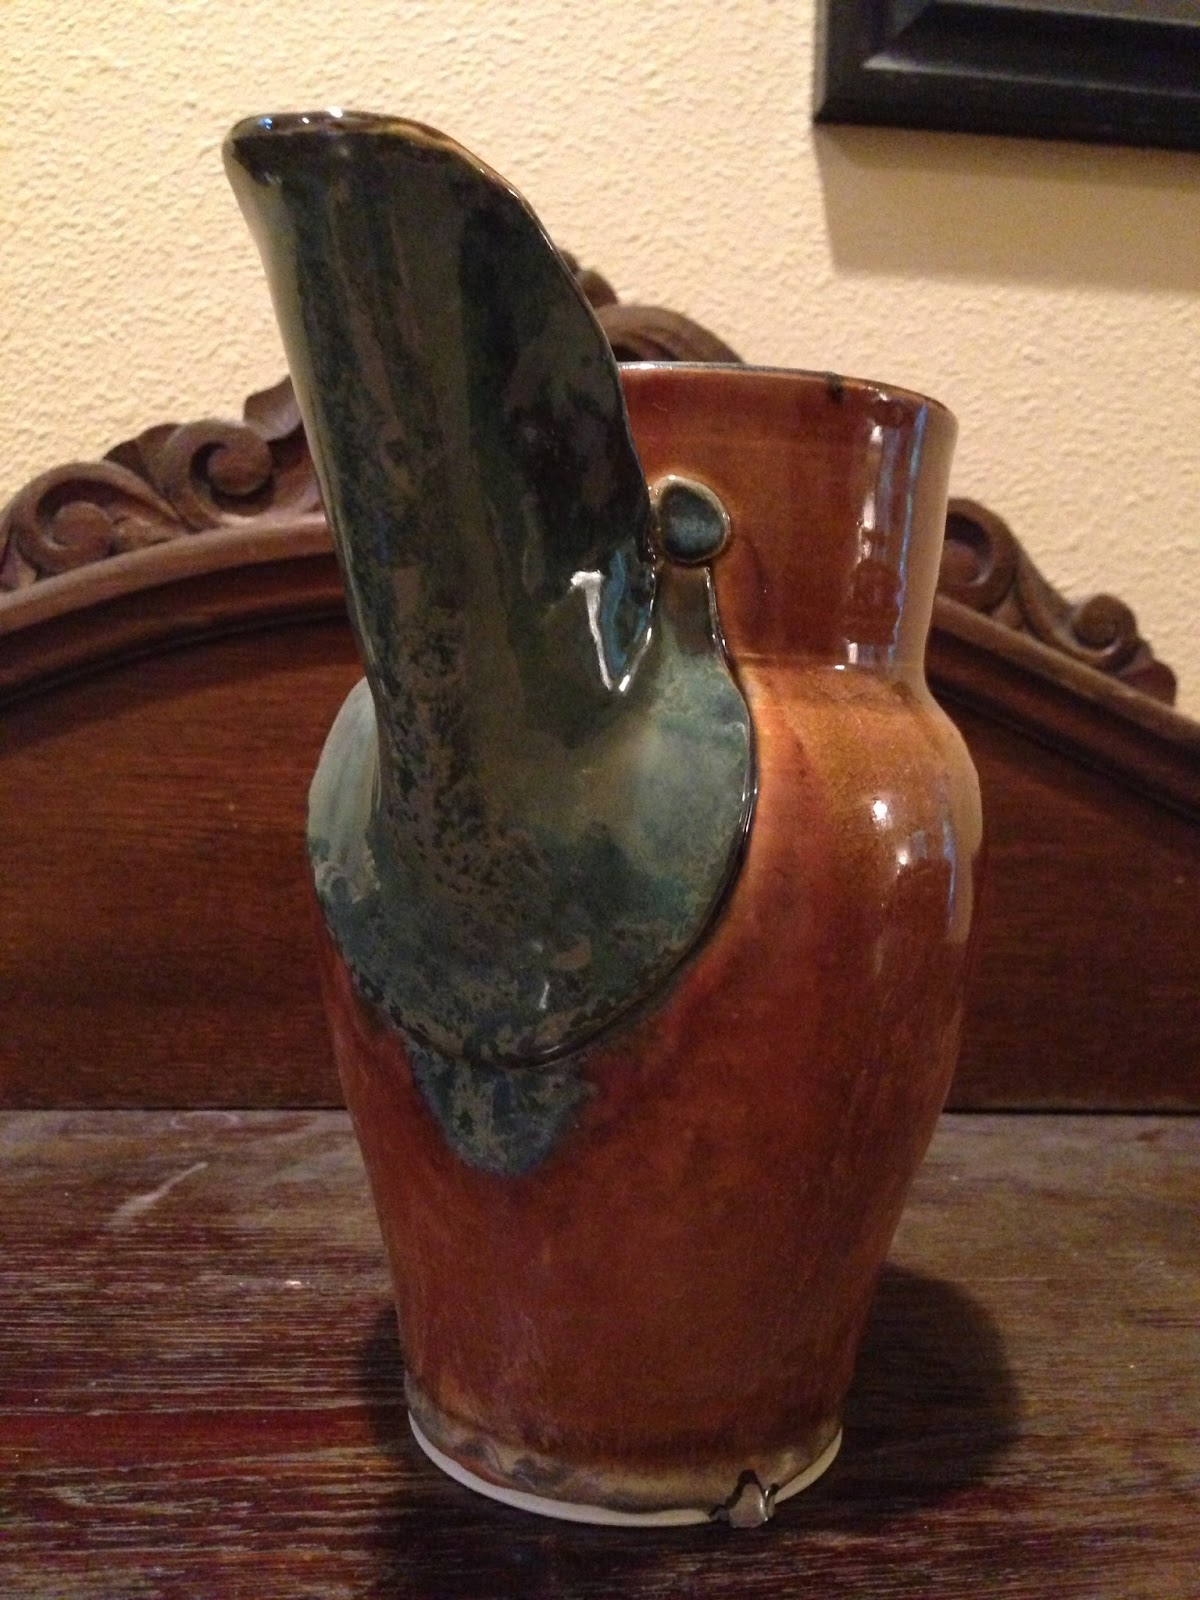
 I love this pitcher. The glaze is on the body is a new glaze to me. It is call Red Gold by Coyote. It has a great way of giving different tones and visual textures on the body of the pitcher. Both inside and out the final look of the glaze looks as thought the glaze is running down the body of the pitcher. Which is exactly what it did during the firing process.
The final firing of my pottery is current a cone 6- that is a whopping 2,232 degrees! When the kiln reaches that temperature, the glaze melts and turns into molten glass. Depending on the glaze, various ingredients then float to the surface of the glaze and start to move with gravity's influence.
 In fact, you can see on the foot of this piece a little dollop of glaze that that flowed down to the shelf. Instead of grinding the dollop of glaze off, I left it in place. I love how it adds to the overall feel of the pitcher.
The glaze on the spout is called Pam's Green by Coyote. It is a similar glaze as the Red Gold in that it has a floating flow also. Instead of being a solid green, it has visual textures that create an interesting effect. Pam's green was also applied to the button on the spout, but over top of it I added two coats of Pansy Purple. The result is a subtle blue that gives just a touch more accenting than the color on the spout.
The handle is also a point of interest to me also. I kept it the same color as the body because I didn't want it to have detached look to it. By keeping it consistent withe the body of the pitcher, the Red Gold helps to keep the handle firmly "attached" to the body visually. But, it also enhances the personality of the pitcher by adding extra width and grace to the overall form.

Tweet
 http://potteryandmore.blogspot.com/2013/04/gold-and-green-pitcher.html


